First things first
First you will need to obtain the Gemini API key from Google and paste it on the settings page (screenshot shown for the web app version, in this case the settings are under the rightmost tab of the chat page):

Familiarizing yourself with the chat
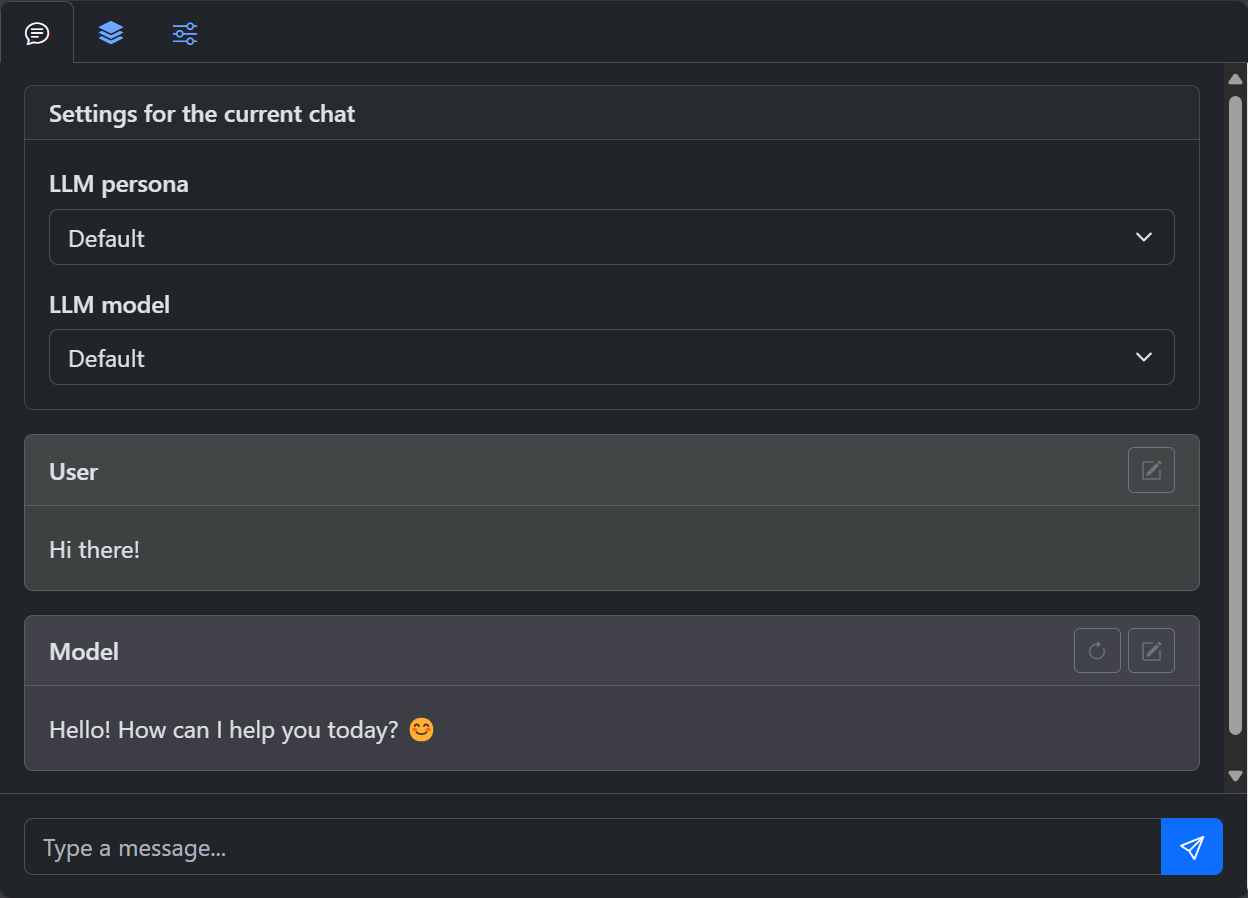
Open the chat page in the web app or the side panel in the extension. On the chat tab pane type "Hi there!" into the input box at the bottom and press Ctrl+Enter on PC or Cmd+Enter on Mac or click the "Send" button next to the input box. If everything went fine, you will see something like this:
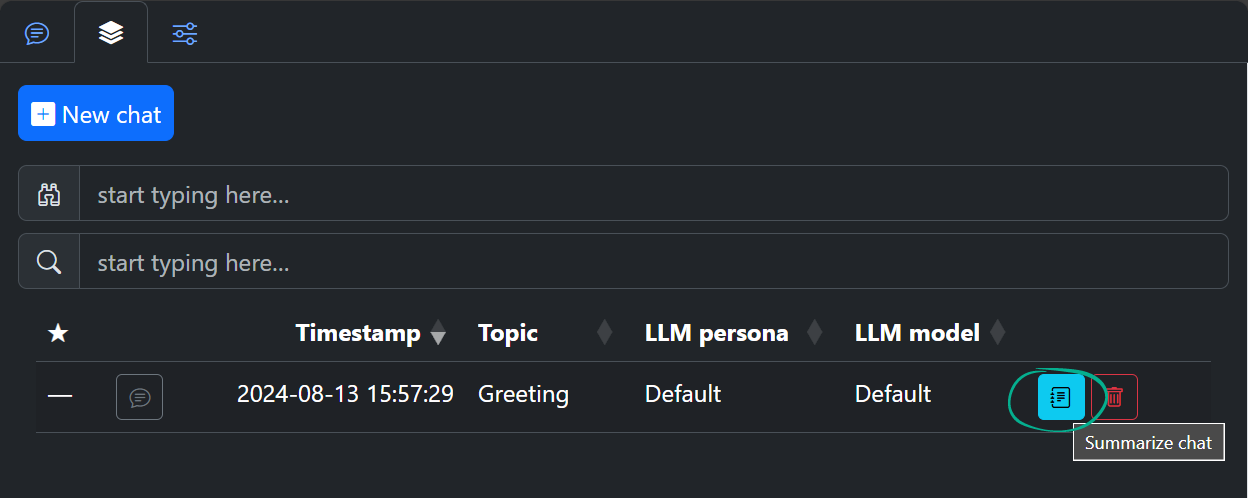
Open the Chat List tab and press "Summarize chat" button to assign a title to a chat and add it to the fuzzy search database. Normally, you would do this when the chat has 3-10 messages and the title is not as trivial as "Greeting". You should get something like this:
Go back to the Chat tab and try regenerating the LLM’s message by pressing the button in the message card header. If you stick to default model, you will get the same message after regeneration. Let’s see how to fix that and introduce some variety in responses.
Models
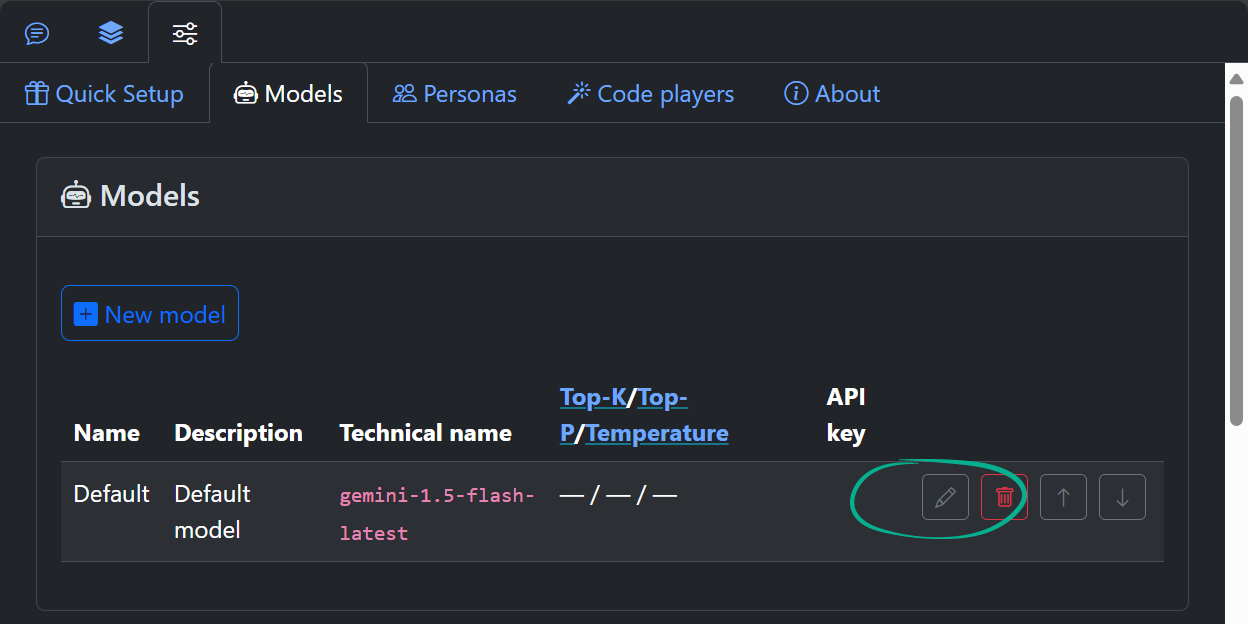
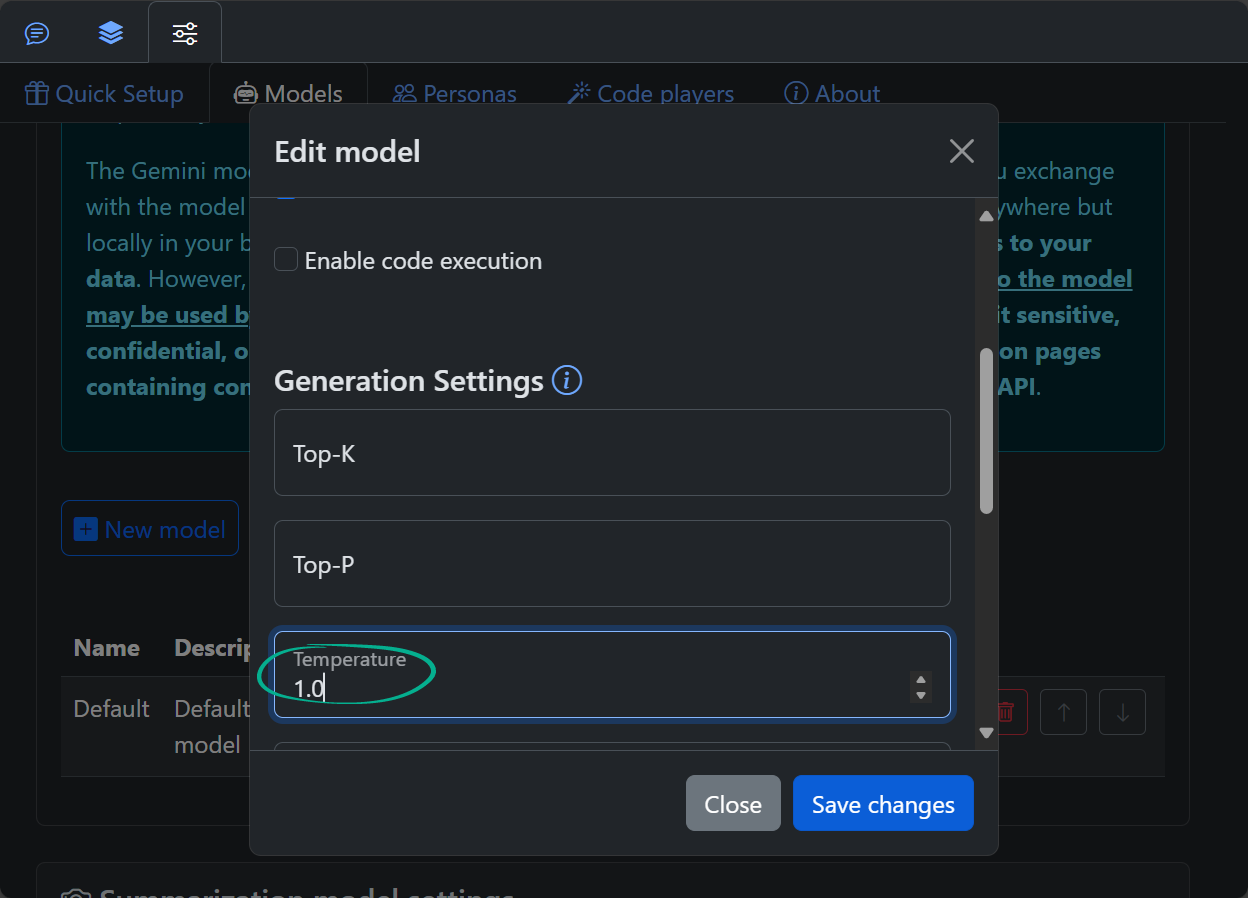
Go to the models settings and change the temperature parameter of the default model to 1.0:
Now go back to the chat and try regenerating the message multiple times. You will now see slightly different messages from time to time. Refer to Google Gemini documentation for the other parameters influencing the creativity and stability of the model’s output (Top-K and Top-P).
Personas
Personas are essentially named system instructions (a.k.a. system prompts) that steer the behaviour of LLMs. These are powerful tools to influence the model output format depending on a particular application. Try importing a “Doc” persona (that makes the model impersonate well-known Emmett Brown character) using the following link (click it to copy it to clipboard)
and pasting it into the Import Persona dialog in the Personas tab of the Settings page:
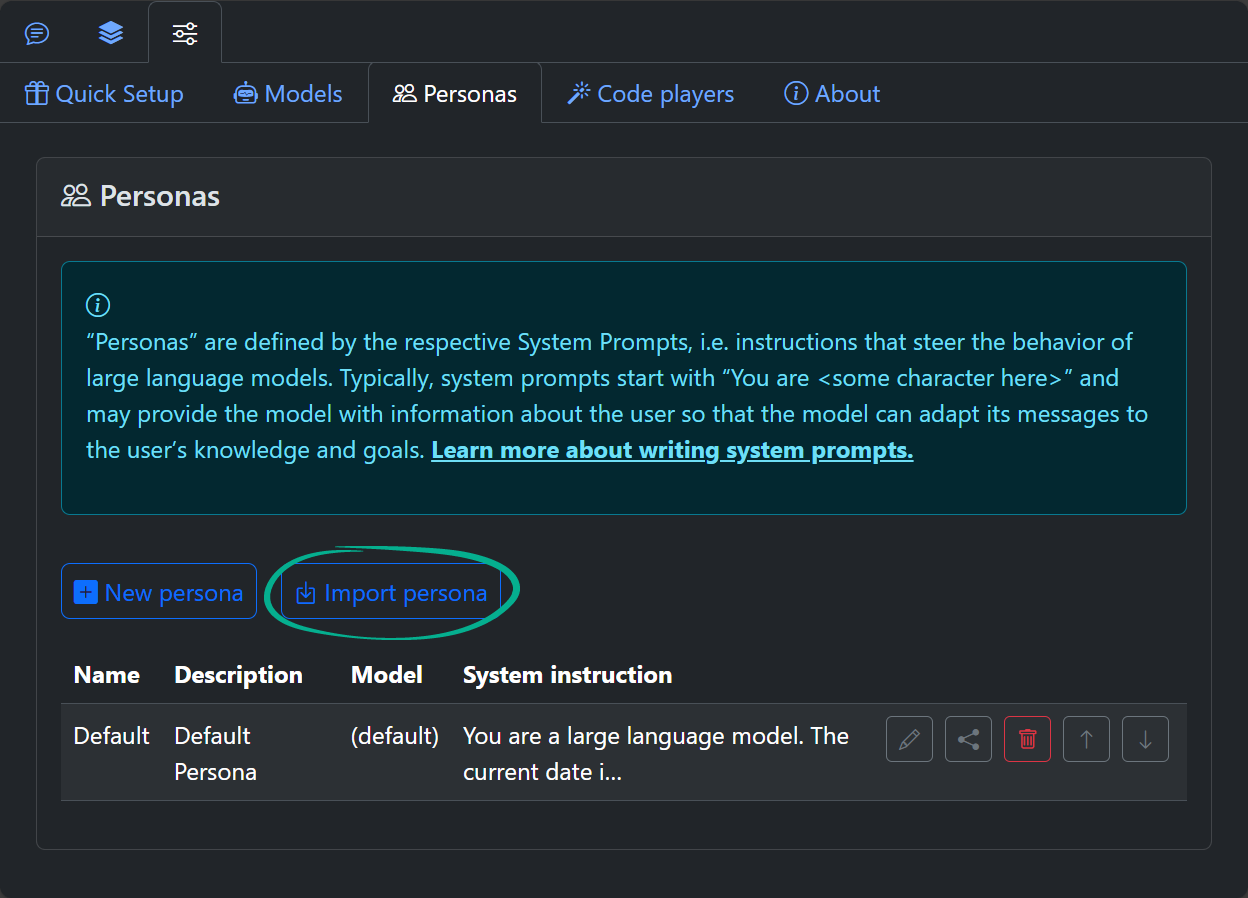
(Do not try to open this link in the browser, this is used solely for importing purposes as of now.)
Start a new chat by clicking the “New Chat” button:
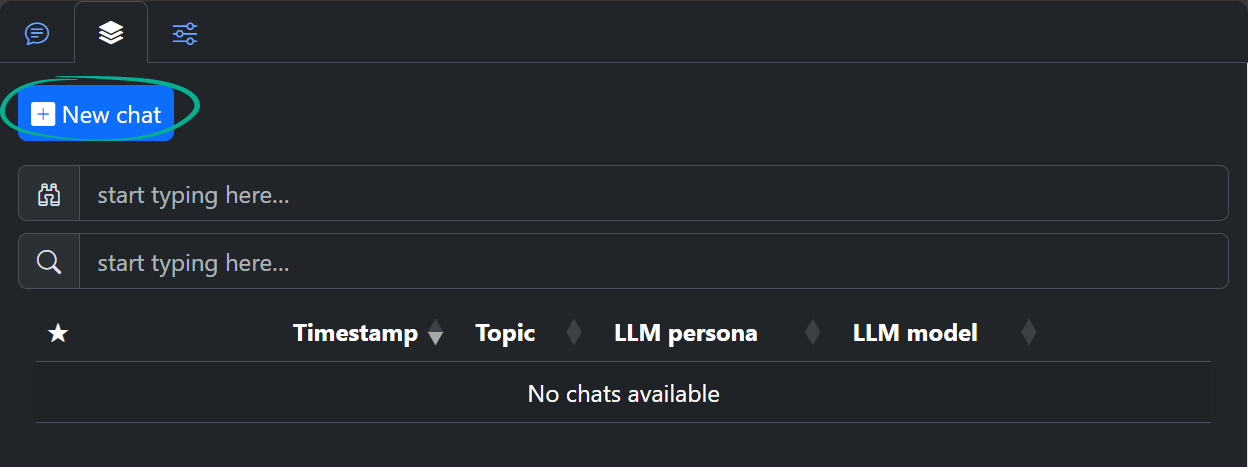
You now have the imported persona available in the list of personas for the chat:
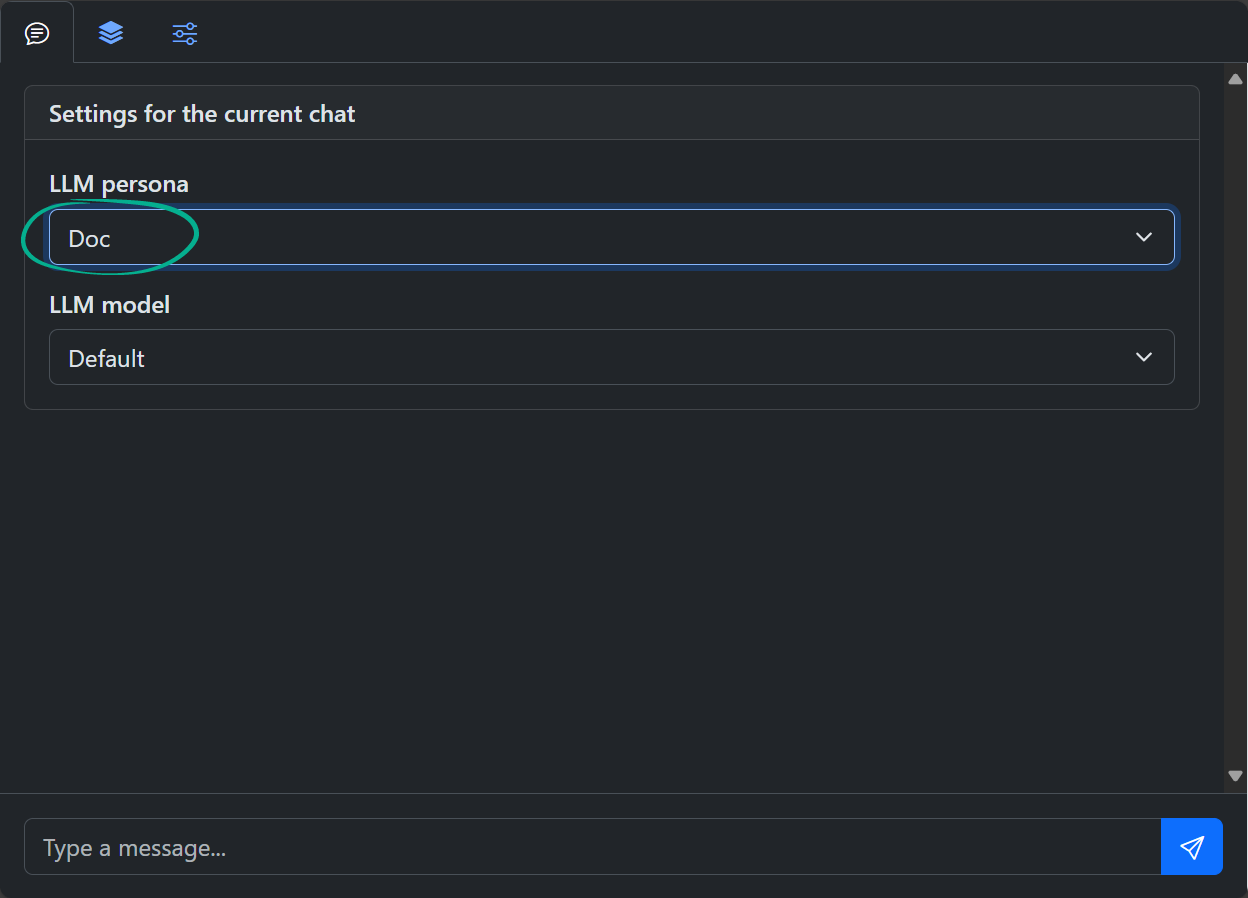
Try asking a few questions to the persona in the chat and see the results!
Markdown in the chat
There are two de-facto standard formats for message exchange with an LLM: Markdown for humanly conversation and JSON for structured data. The chat has an integrated Markdown editor. To edit any message press the button. To save the message either press Ctrl+Enter or Cmd+Enter within the editor or press the button.
Any block of code (e.g. JSON, Python, JS, …) within Markdown is surrounded with ``` fences. The type of the block (also called the language tag) comes right after the opening fence. Try pasting the following message into the chat input to see the response on the LLM (using default model and persona):
Code players
In the resulting output of the LLM you should see the Python code block with button enabling you to run the resulting code block in the browser. Such ability is integrated into A10fy for Python code blocks, Mermaid diagrams and Vega JSON specifications. Try asking LLM to Output a simple Mermaid diagram or Draw a minimalistic pie chart with Vega. Press the button to see the code of those diagram and pie chart if it is hidden by default.
You can define a custom code player for any type of code. Let’s consider a non-trivial example of combining a custom persona that is designed to generate quiz specifications with a corresponding custom player that turns the LLM’s output into an actual quiz. Import the following persona:
Now go to the Player import:
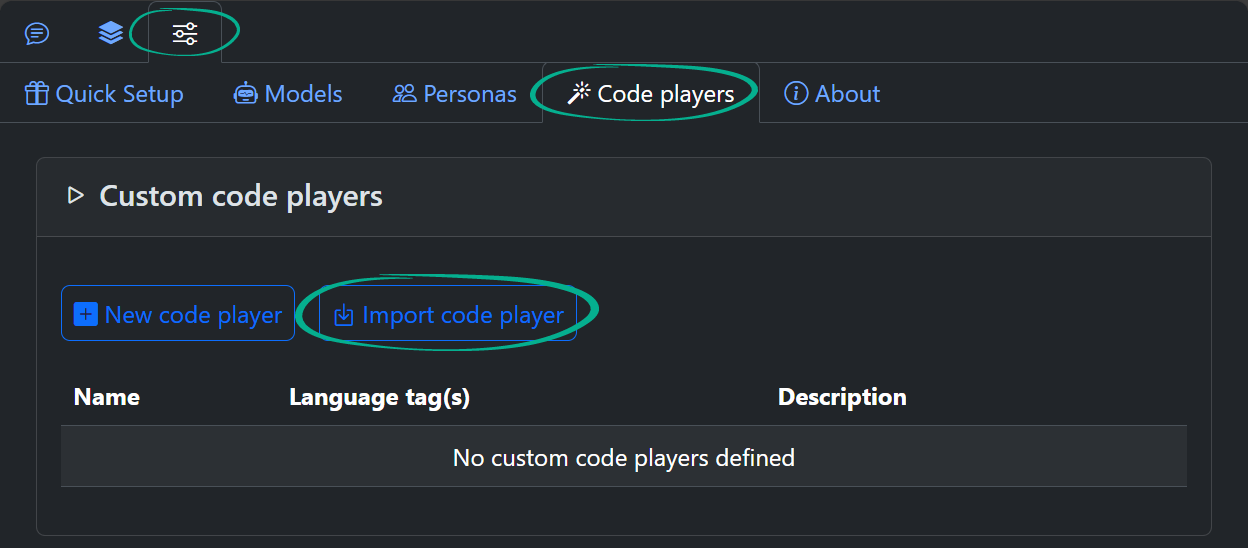
and import the custom player by pasting the following link into the import dialog:
Now start a new chat with the “Quiz generator” persona that you’ve imported and type something like the following message into the chat input:
You will get an interactive quiz where options can be selected either by double-clicking or dragging them onto the placeholders. You can go to the player settings to see its code. That is nothing but a sandboxed webpage displayed in an iframe. See the player’s code in detail. Note that loading external JS/CSS libs by URL into the player is only possible in the web app version of A10fy; the security policy restrictions for Chromium extensions do not allow that. For convenience though, the following libraries are preloaded even in the extension: Bootstrap 5.3.x, KaTeX (with auto-render and copy-tex extensions), Liquid.JS, jQuery 3.7.x (to be replaced with version 4.x on its release), jQuery UI 1.14.x. Library versions are subject to change. Any other library should be bundled with the code of the player for it to be functional in Chromium extension version of A10fy.
Please note that currently the player’s state is not saved along with the chat, so it is best to use players for a short-to-medium length tasks that can be completed in one take.
You can also try a Crossword Player (see the preview and the sharing link) and an accompanying persona (sharing link). More players to follow. You are always welcome to design you own of course! 😉
Extension-specific feature: AI Assistant
While the chat is available in both web app and Chromium extension versions of A10fy, there are two features that available only in the extension: AI Assistant, Fuzzy Page Search and LLM query on specific DOM element.
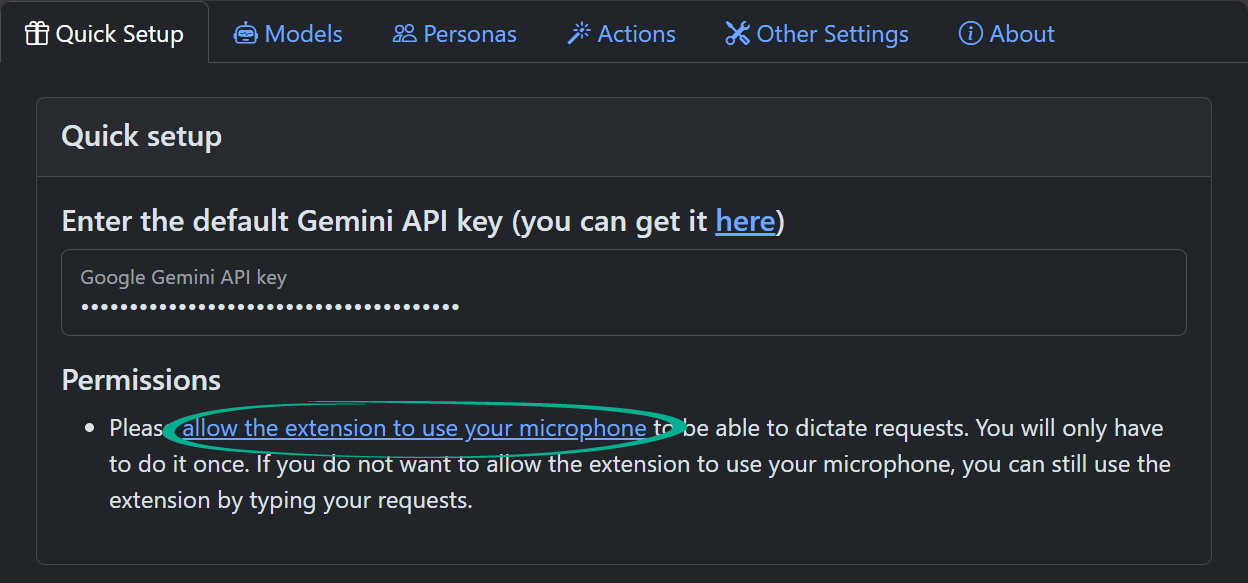
AI Assistant feature is the ability to call LLM putting the web page in the current browser tab into context. By default, LLM will be given a screenshot and a simplified version of the HTML code of the page. Querying the page can be accomplished either by using the extension’s popup menu or with hotkeys (set them up using your browser’s extension hotkeys page, e.g. edge://extensions/shortcuts in Microsoft Edge). To dictate queries (commands) you’ll need to allow the extension to use your microphone on the settings page:
Try opening the popup menu on any web page and select either voice or text command:
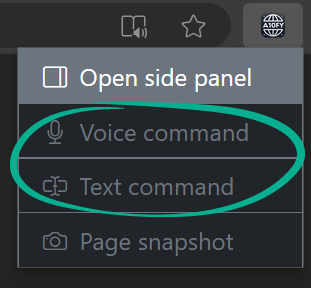
After clicking the “Voice command” button you will hear a “ding” sound marking the beginning of the audio recording process. After dictating your command click the same button again to transmit the audio to LLM along with the page content. If you select “Text command” instead, you will be prompted to enter the command/query in the popup of the current tab. Some things to try out as commands:
- Summarize the page and speak the summary.
- Describe what you see on the page.
- Scroll to the paragraph containing the answer to [some question here].
- What notable resources are listed on the page?
The Assistant will either display the answer to your query in the actions pane of the side panel (make sure you have it opened in advance to see the message)
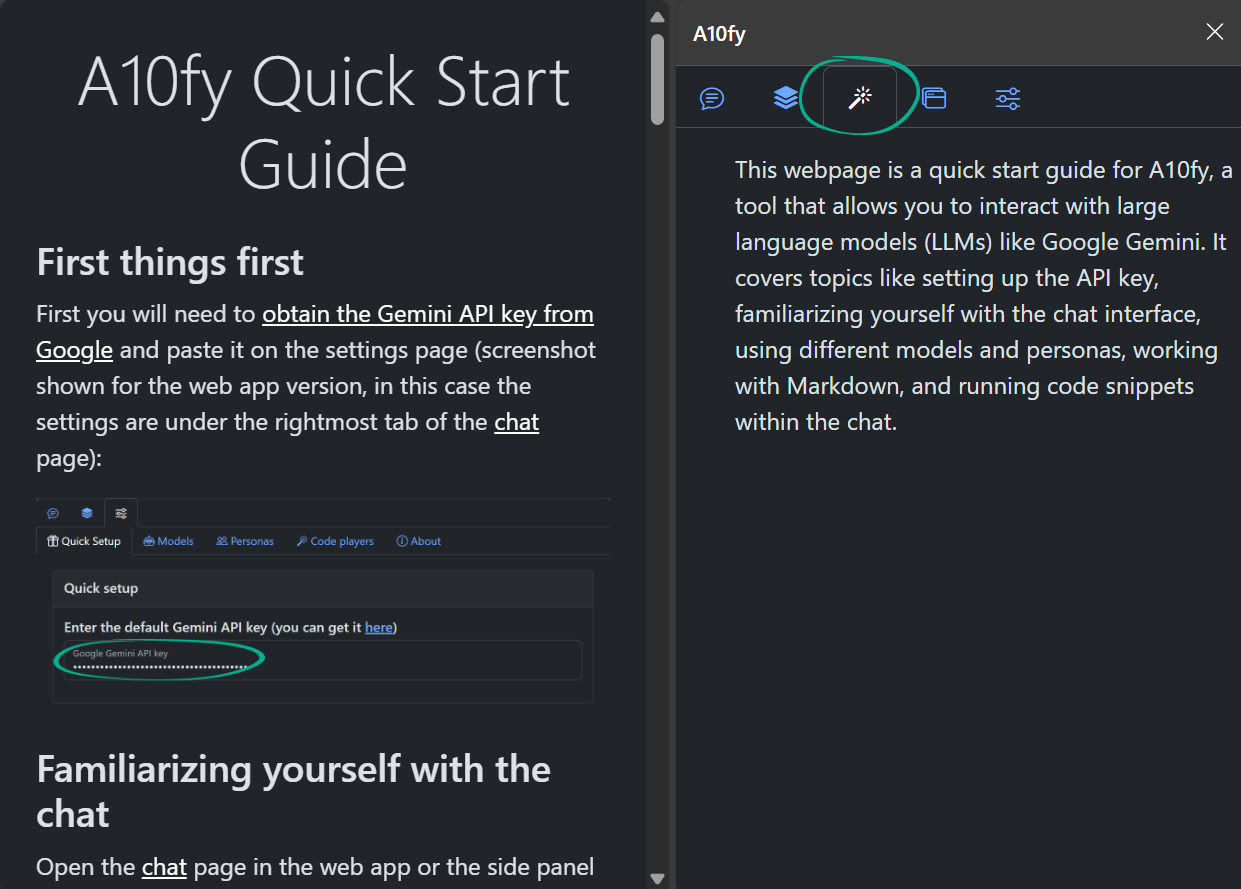
or will be dictated using your browser’s text-to-speech engine or will result in some modifications on the page itself. It is a good idea to steer the behaviour of the model by telling it in what way to provide the answer if it matters and is unclear from the main part of the query.
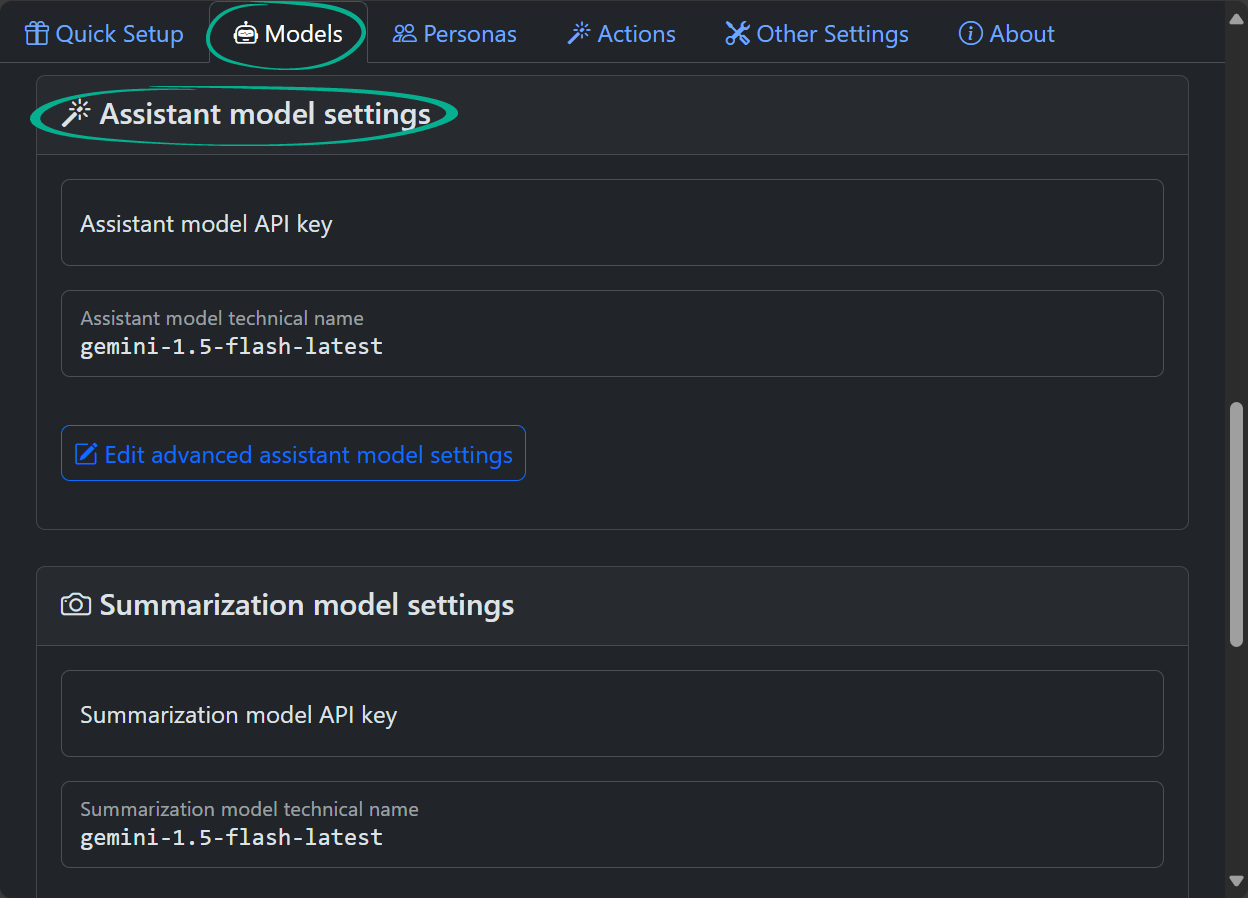
To change the model that powers the AI Assistant feature, go to the Models tab of the Settings page:
Extension-specific feature: Fuzzy Page Search
Another feature available only in the extension is the Fuzzy Page Search. It is a tool to search for pages in the browser history by their summarized content. For the page to appear in the fuzzy search results, its snapshot should be taken (via extension popup menu or using a keyboard shortcut). The model which is used for page summarization can be tweaked in the Models tab of the extension Settings page (the model used to produce vector text embeddings powering the fuzzy search is also present there).
To search for pages whose snapshots were previously taken, go to the corresponding tab of the extension side panel:
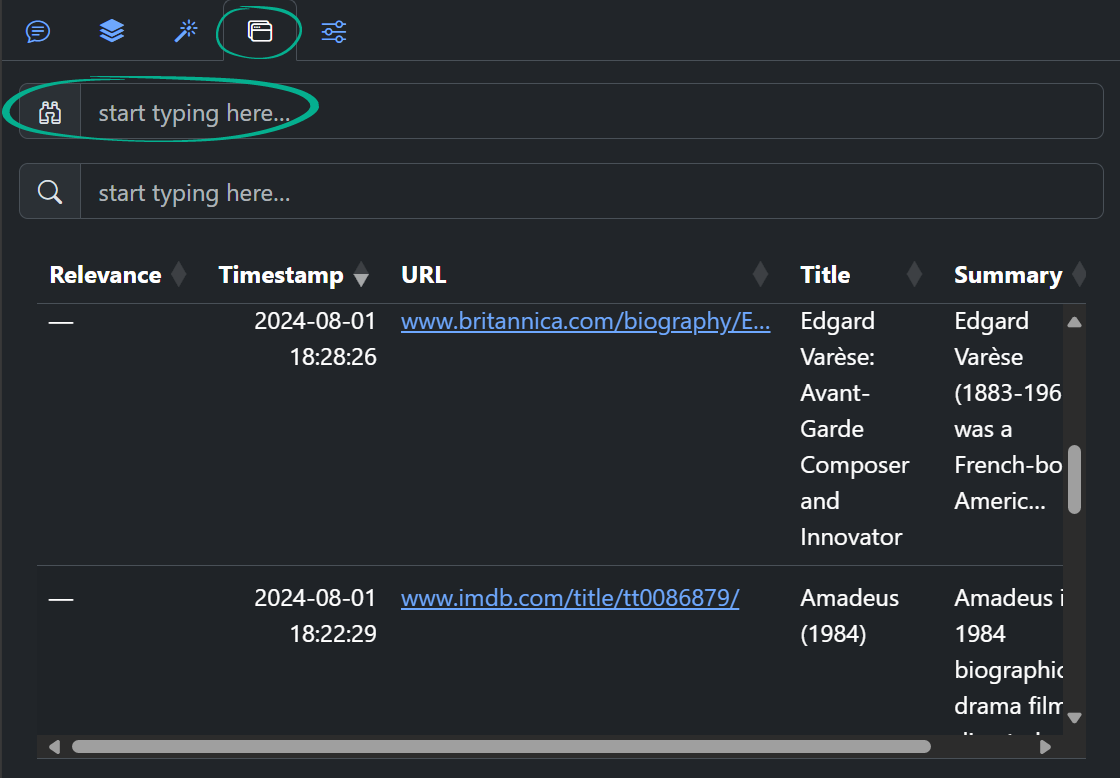
The input field marked with binocular is for the fuzzy search query, while the one marked with magnifying glass is for more conventional search. Most of the time entering a meaningful query into the “binocular” input field will suffice. Note that the complete textual content of the web pages is not currently saved; only a title, keywords, short summary and up to 3 vectors characterizing the page are stored. If the page content has changed since the last snapshot was taken, you will only have access to the current version of the page.
Extension-specific feature: LLM query on specific DOM element
This feature is suitable for technically advanced users of the extension. Earlier in this guide we have introduced an idea that “Custom Persona (i.e., system prompt) + Custom Player = POWER” 😊. With the A10fy Chromium extension you can get one step further by adding a specific page element content/properties into the mix, resulting in a Custom Action concept. Custom actions can be added in the corresponding tab of the Settings page:
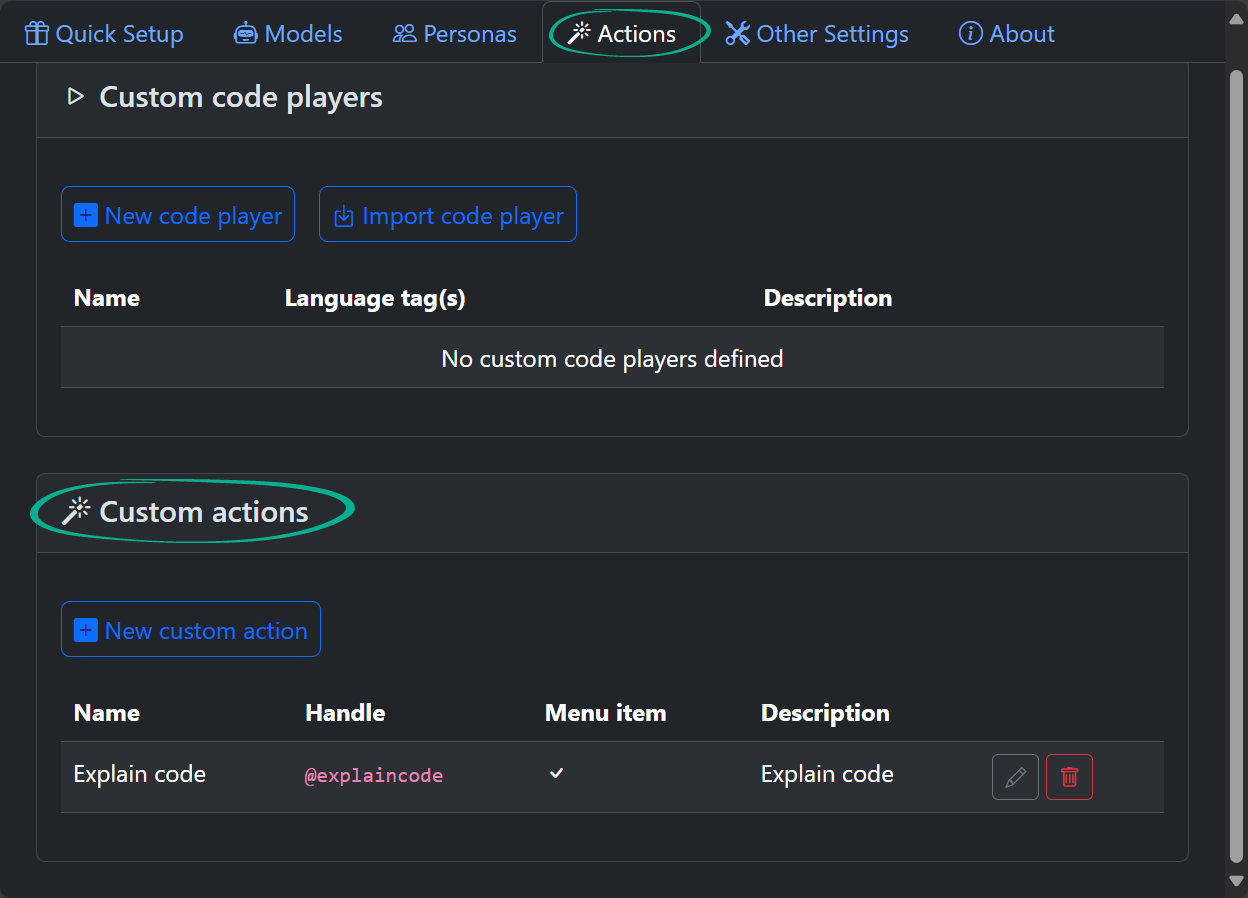
You can define actions suitable e.g. for code or table DOM elements on the page or only for elements with graphical content or for some selected text on a page etc. These actions can be invoked through the browser’s context menu opened on a specific element or text selection. To be able to flexibly modify the system instruction for LLM to process the element correctly, you can use Liquid.JS template syntax enriched with some custom filters that enable further processing of the element’s DOM subtree. See details in the documentation.